Meray Abba has some easy to follow steps to network a Mac and PC, using the skills she gained in her Certificate IV in Information Technology Networking.

Networking Mac and PC with Meray Abba
Meray is studying a Certificate IV in Information Technology Networking. Through this program, she can create private networks to keep her data safe and operate anything from anywhere.
I love how networking can help people connect. I’ve always been curious, wanting to know how things work and trying new things. I think I get it from my mother. She graduated in Computer Science so new technology has always been part of our family discussions.
By connecting computers, we can help people collaborate, share information and create and build on new ideas. It can seem confusing – it is confusing at first – because there’s so many different things to learn.
That’s why I chose to study at RMIT. We did a lot of hands-on work in the Certificate IV course and I was able to explore a little of everything before deciding where I want to put all my energies.
One thing I learned was there used to be an issue with Macs and Windows-based PCs connecting and communicating. You still can’t really connect them – not easily anyway – but you can share folders between the two, making it easy to share documents and other applications within the folder...like creating a secret tunnel between the two.
Get on the same page
Actually – get on the same network.
The first thing you need to do is make sure both computers are on the same network.
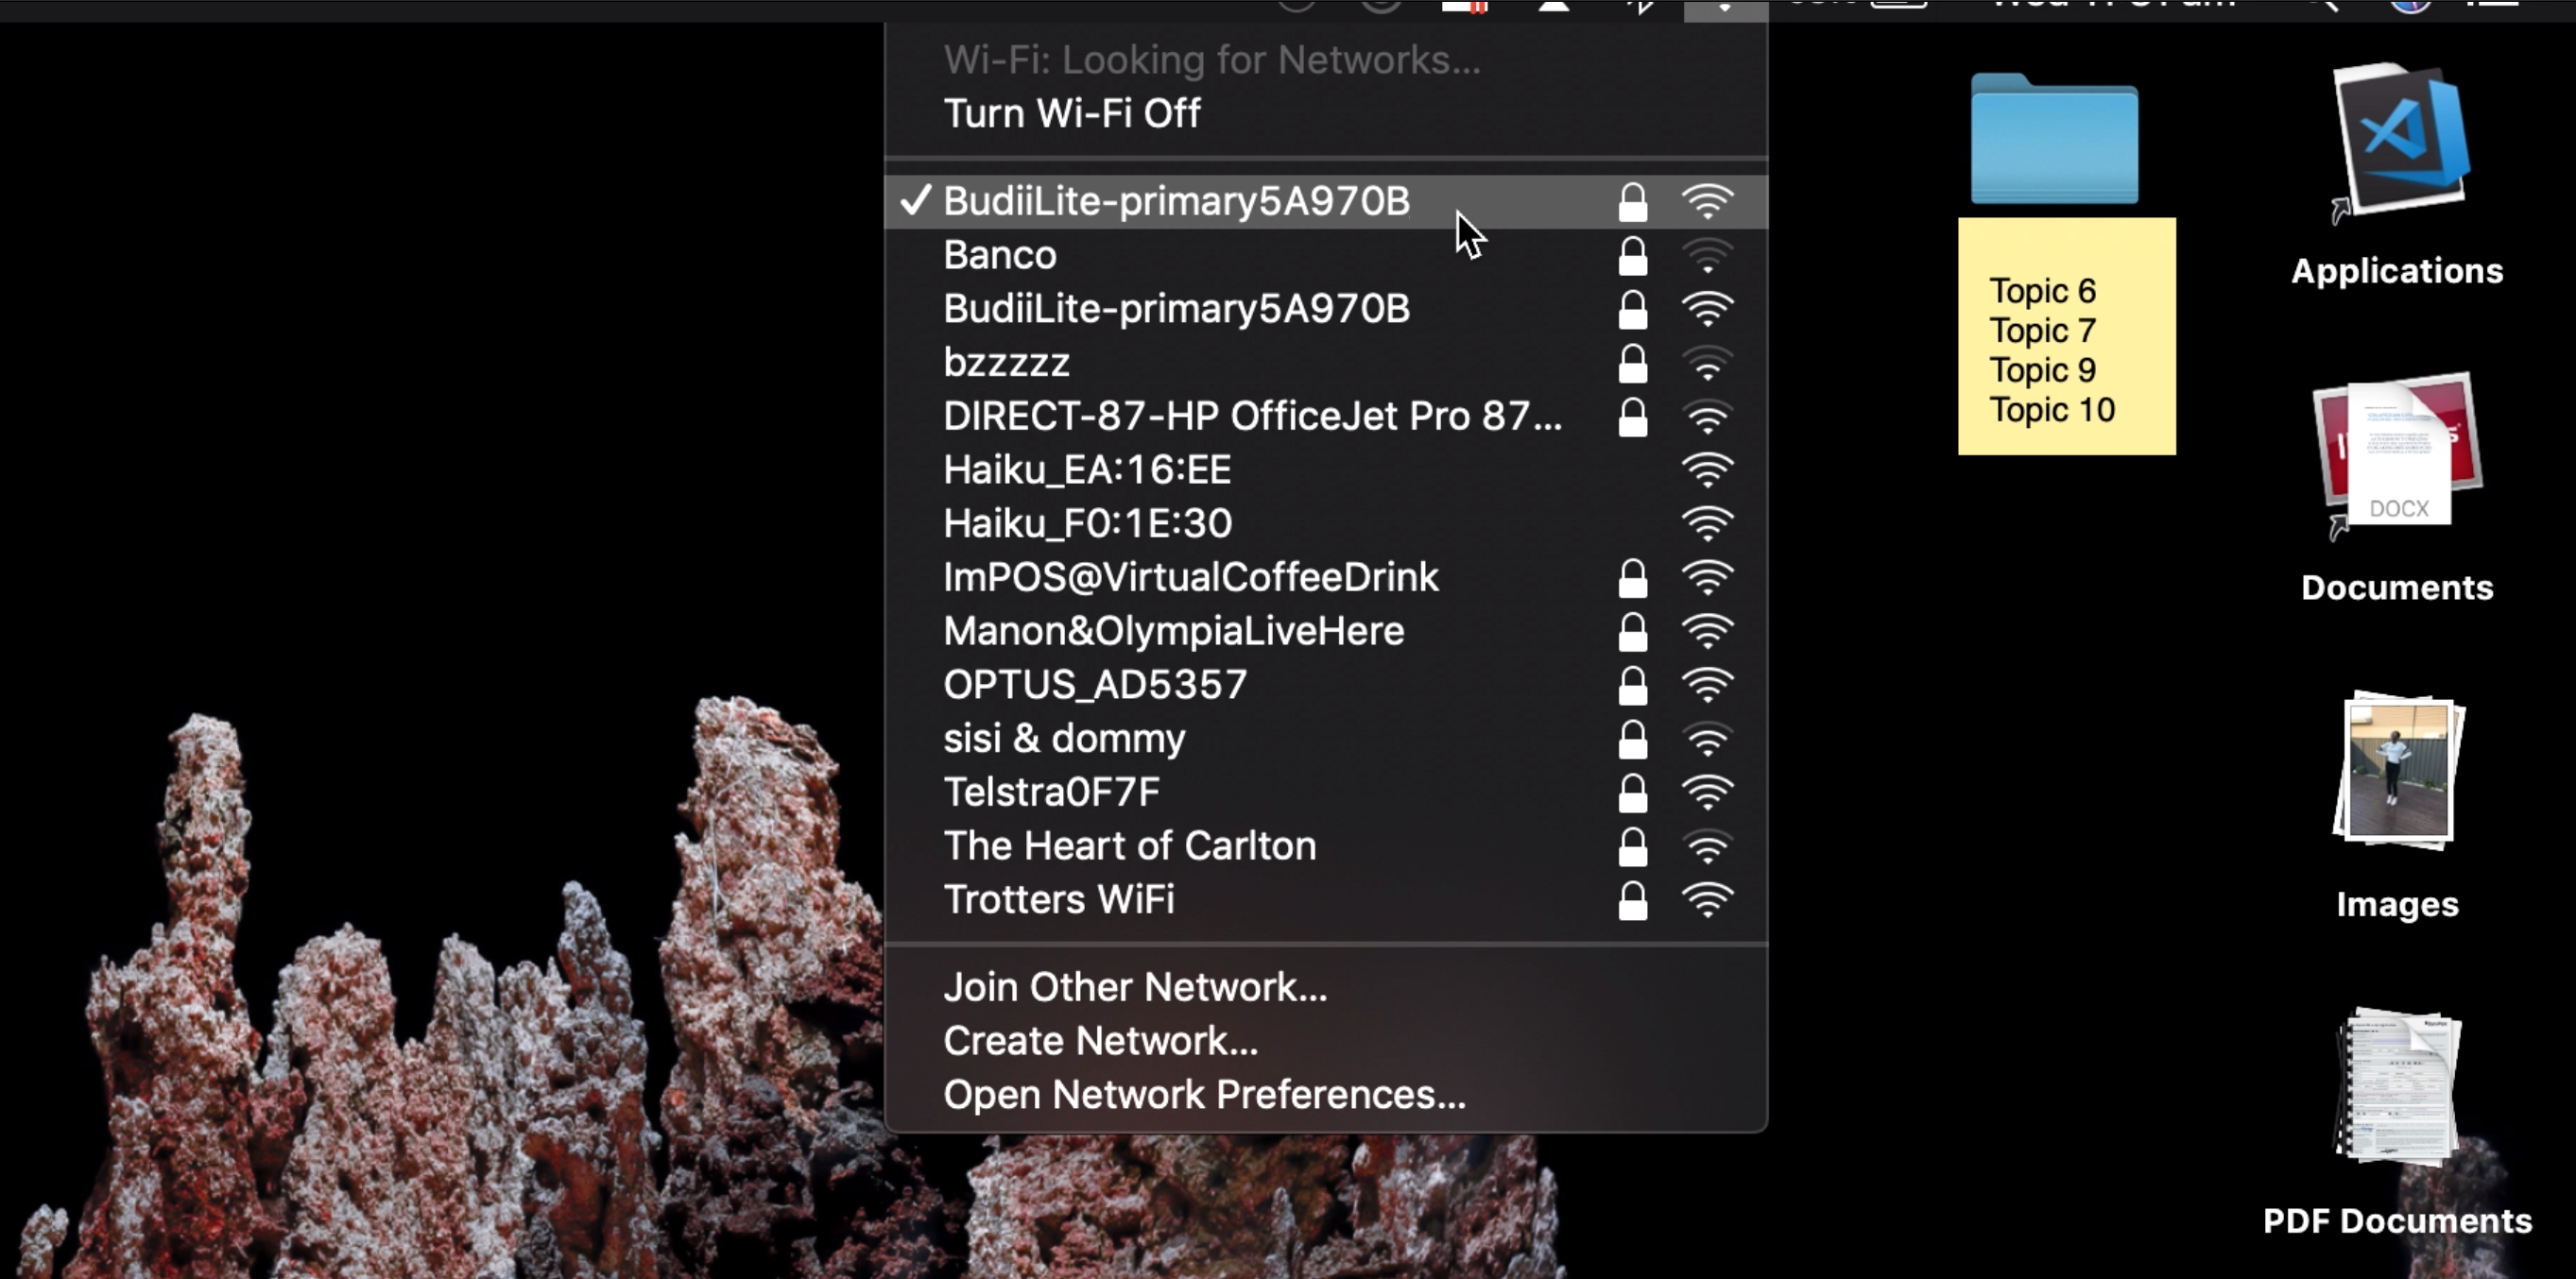
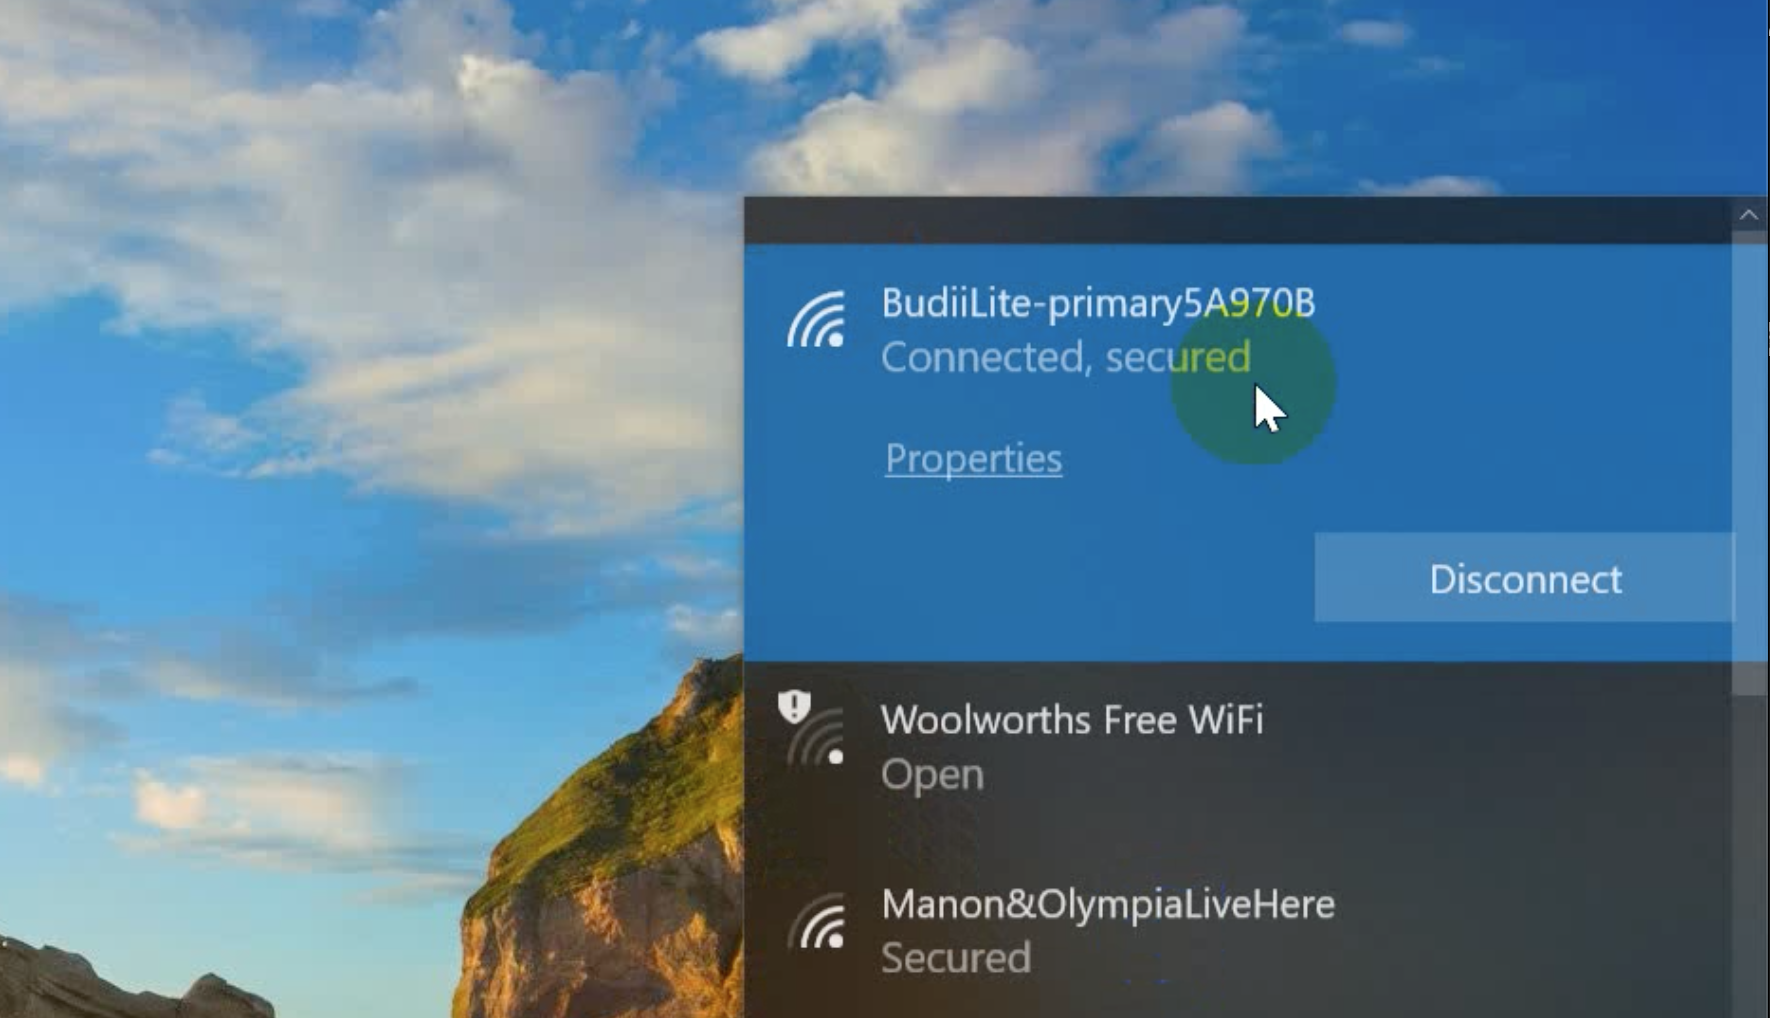
This sounds like a no-brainer, but it’s amazing how often side-by-side computers are on different networks in large offices.
Prepare to share
You’ll need to enable file and folder sharing on both computers. This is easy.
On a Mac.
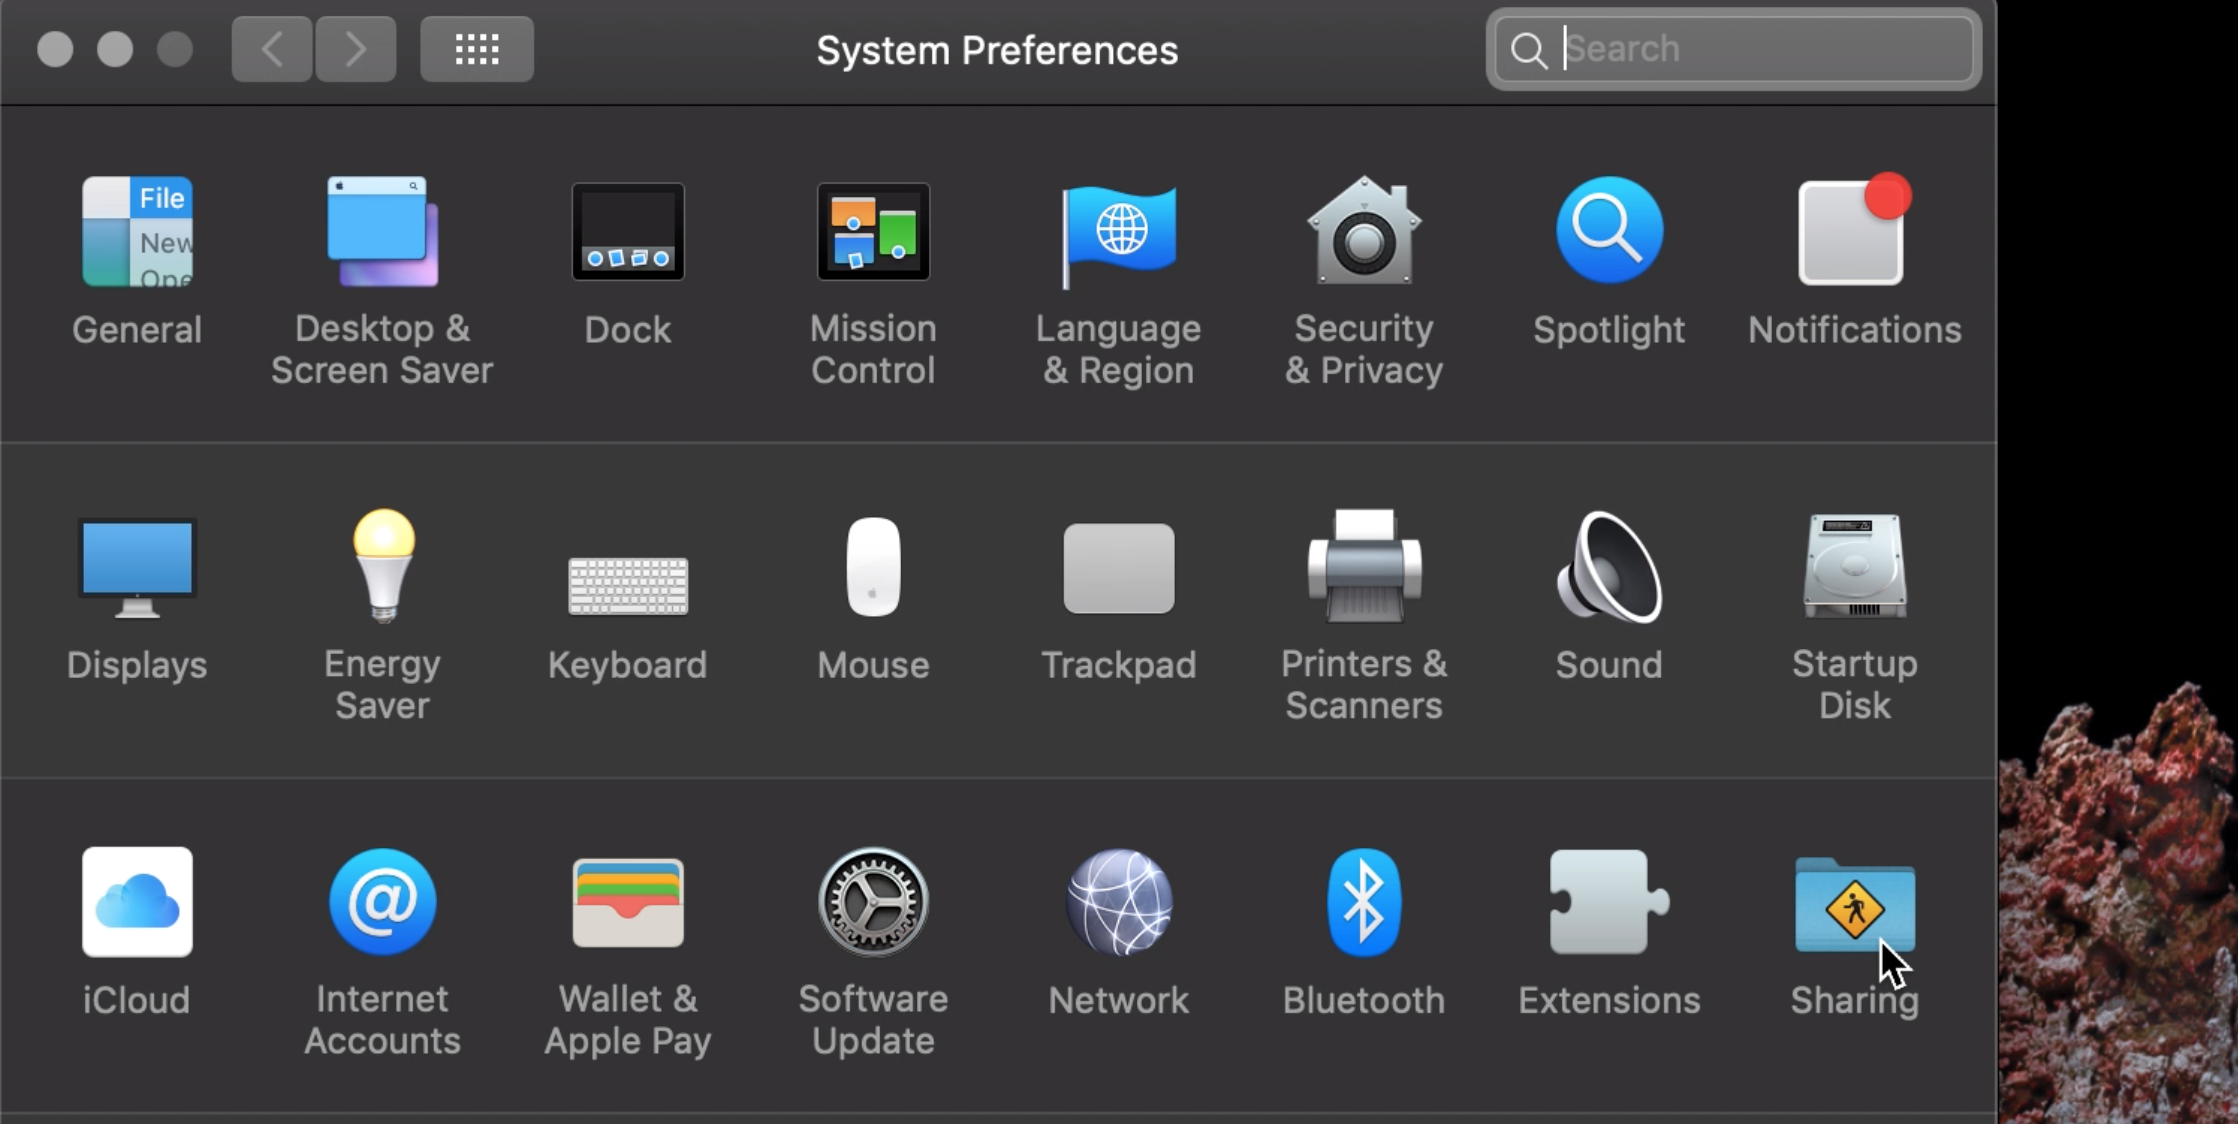
Click on the Apple logo in the top left of the screen.
Open your system preferences.
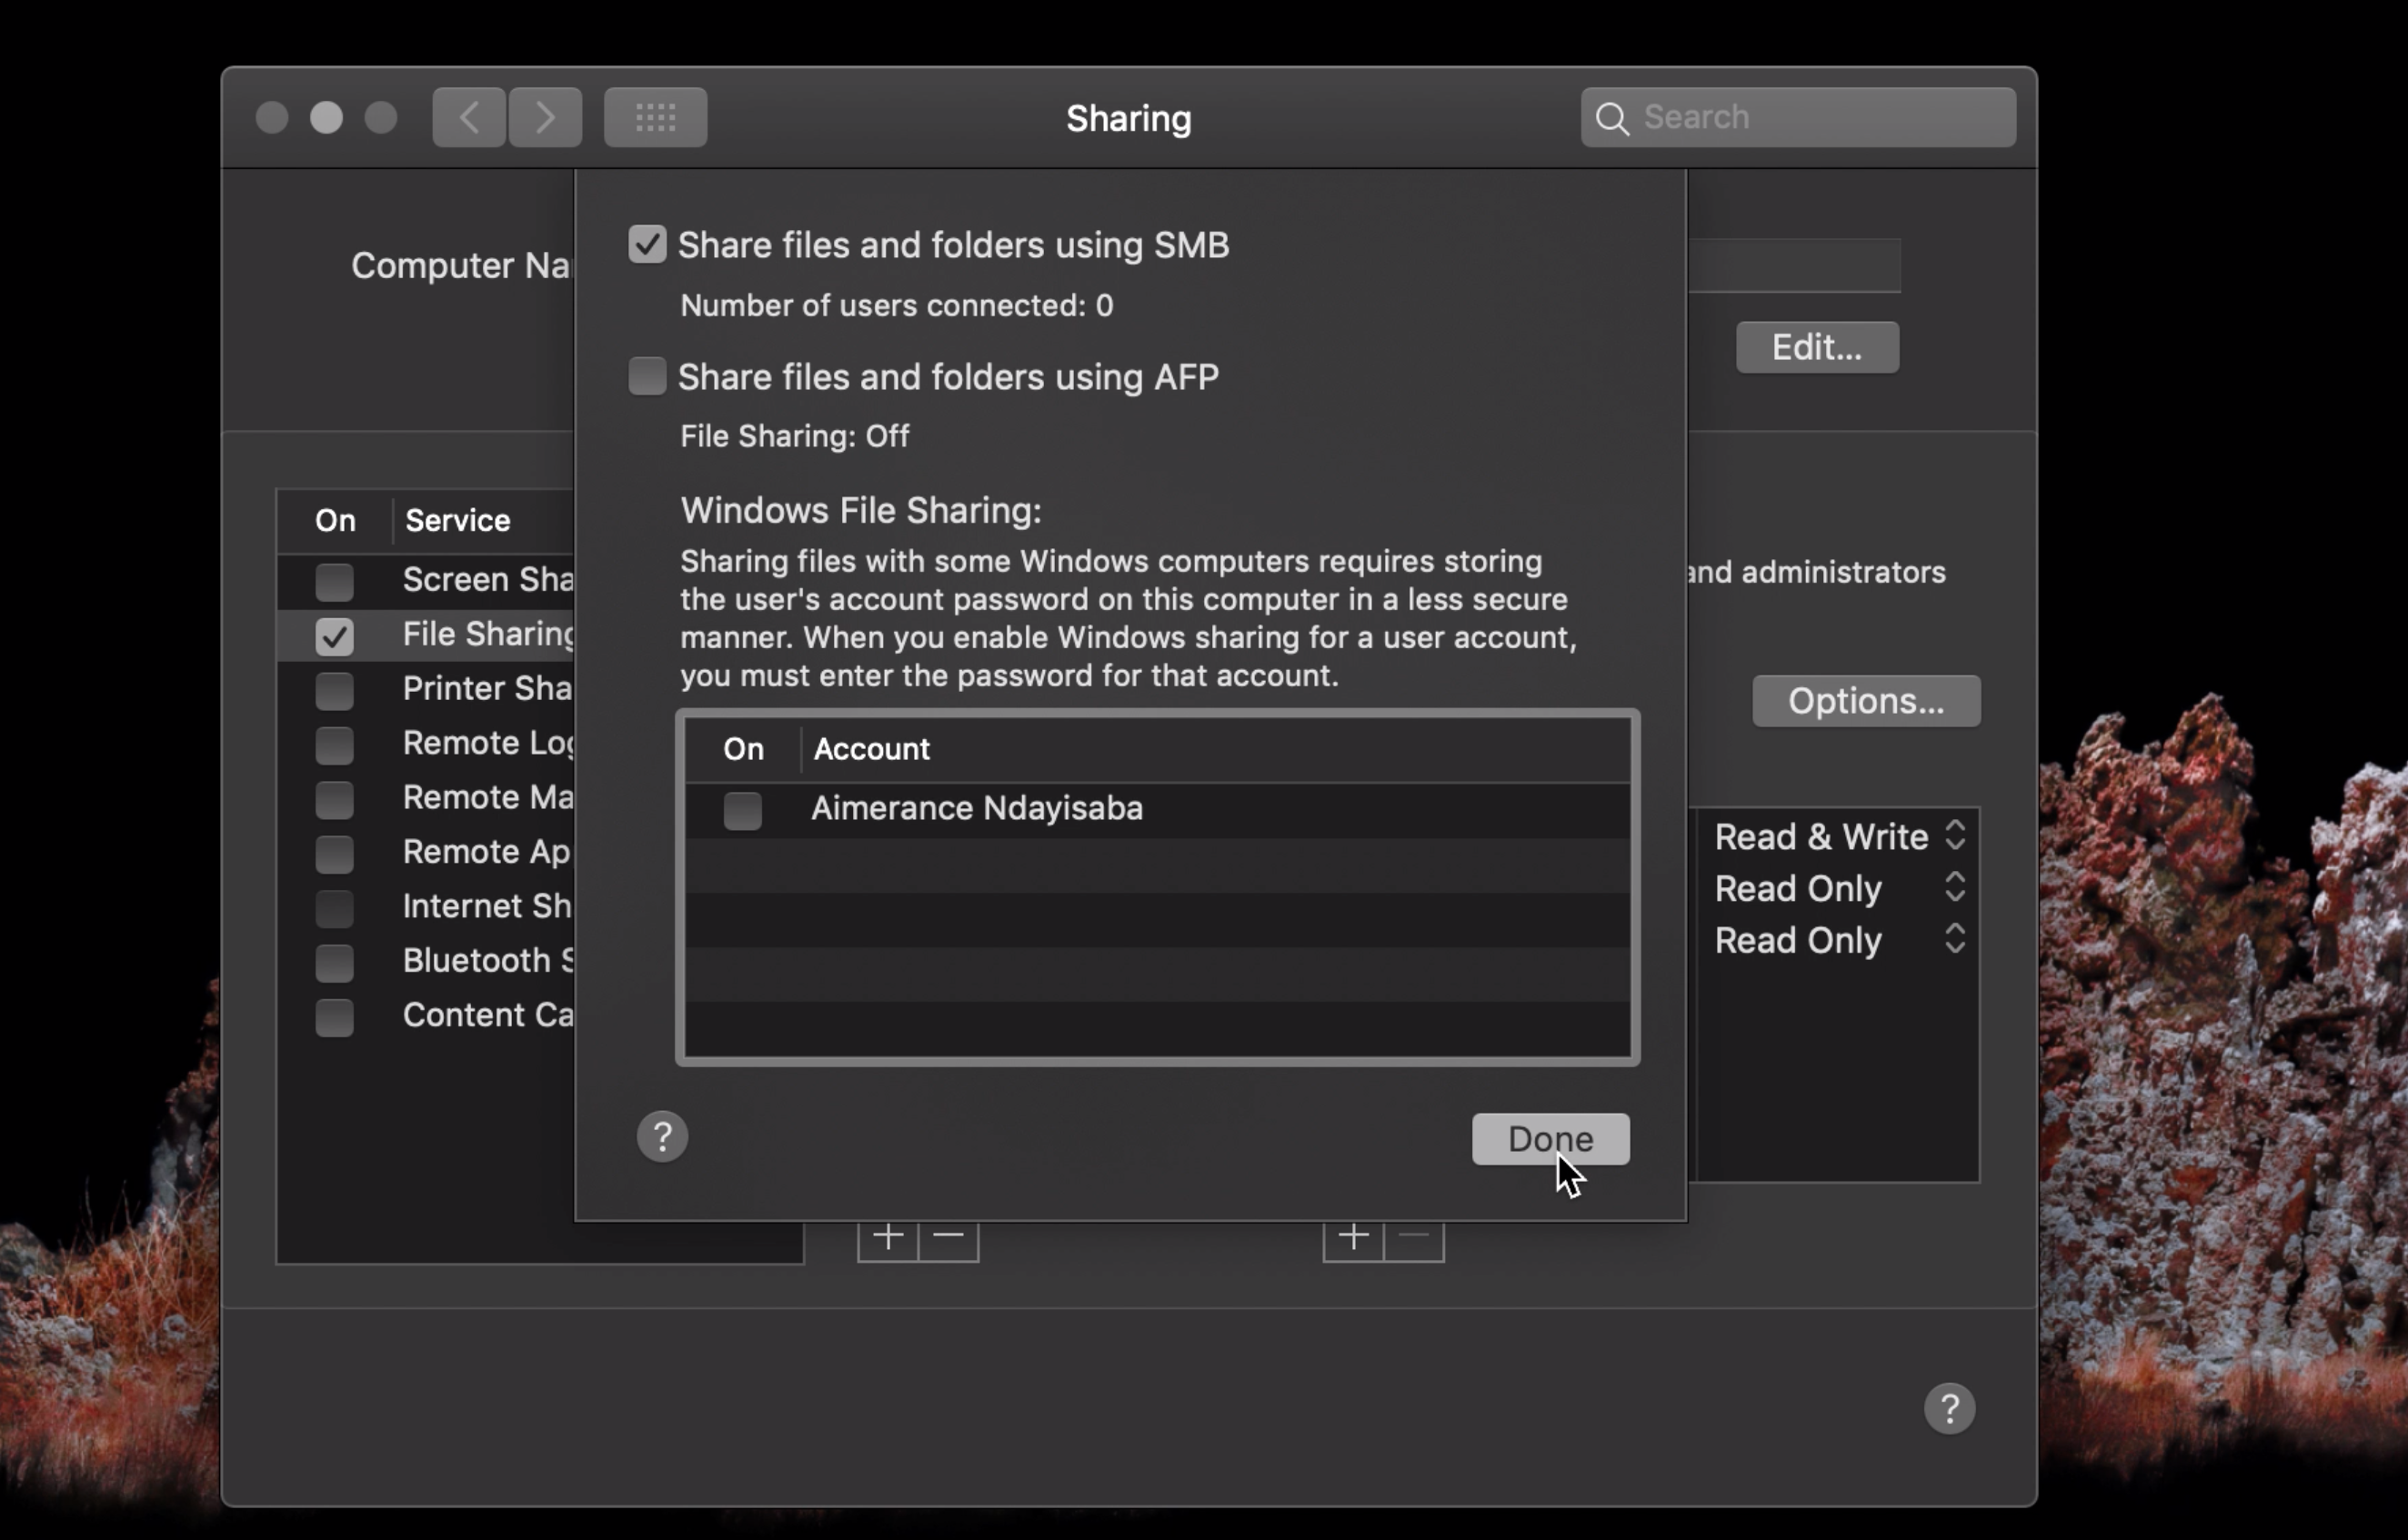
In the third row, you’ll see a blue folder labelled “Sharing”[1] – open that.
You see an options button, click that and then click on “Sharing Files and Folders using SMB (Windows).
On a PC.
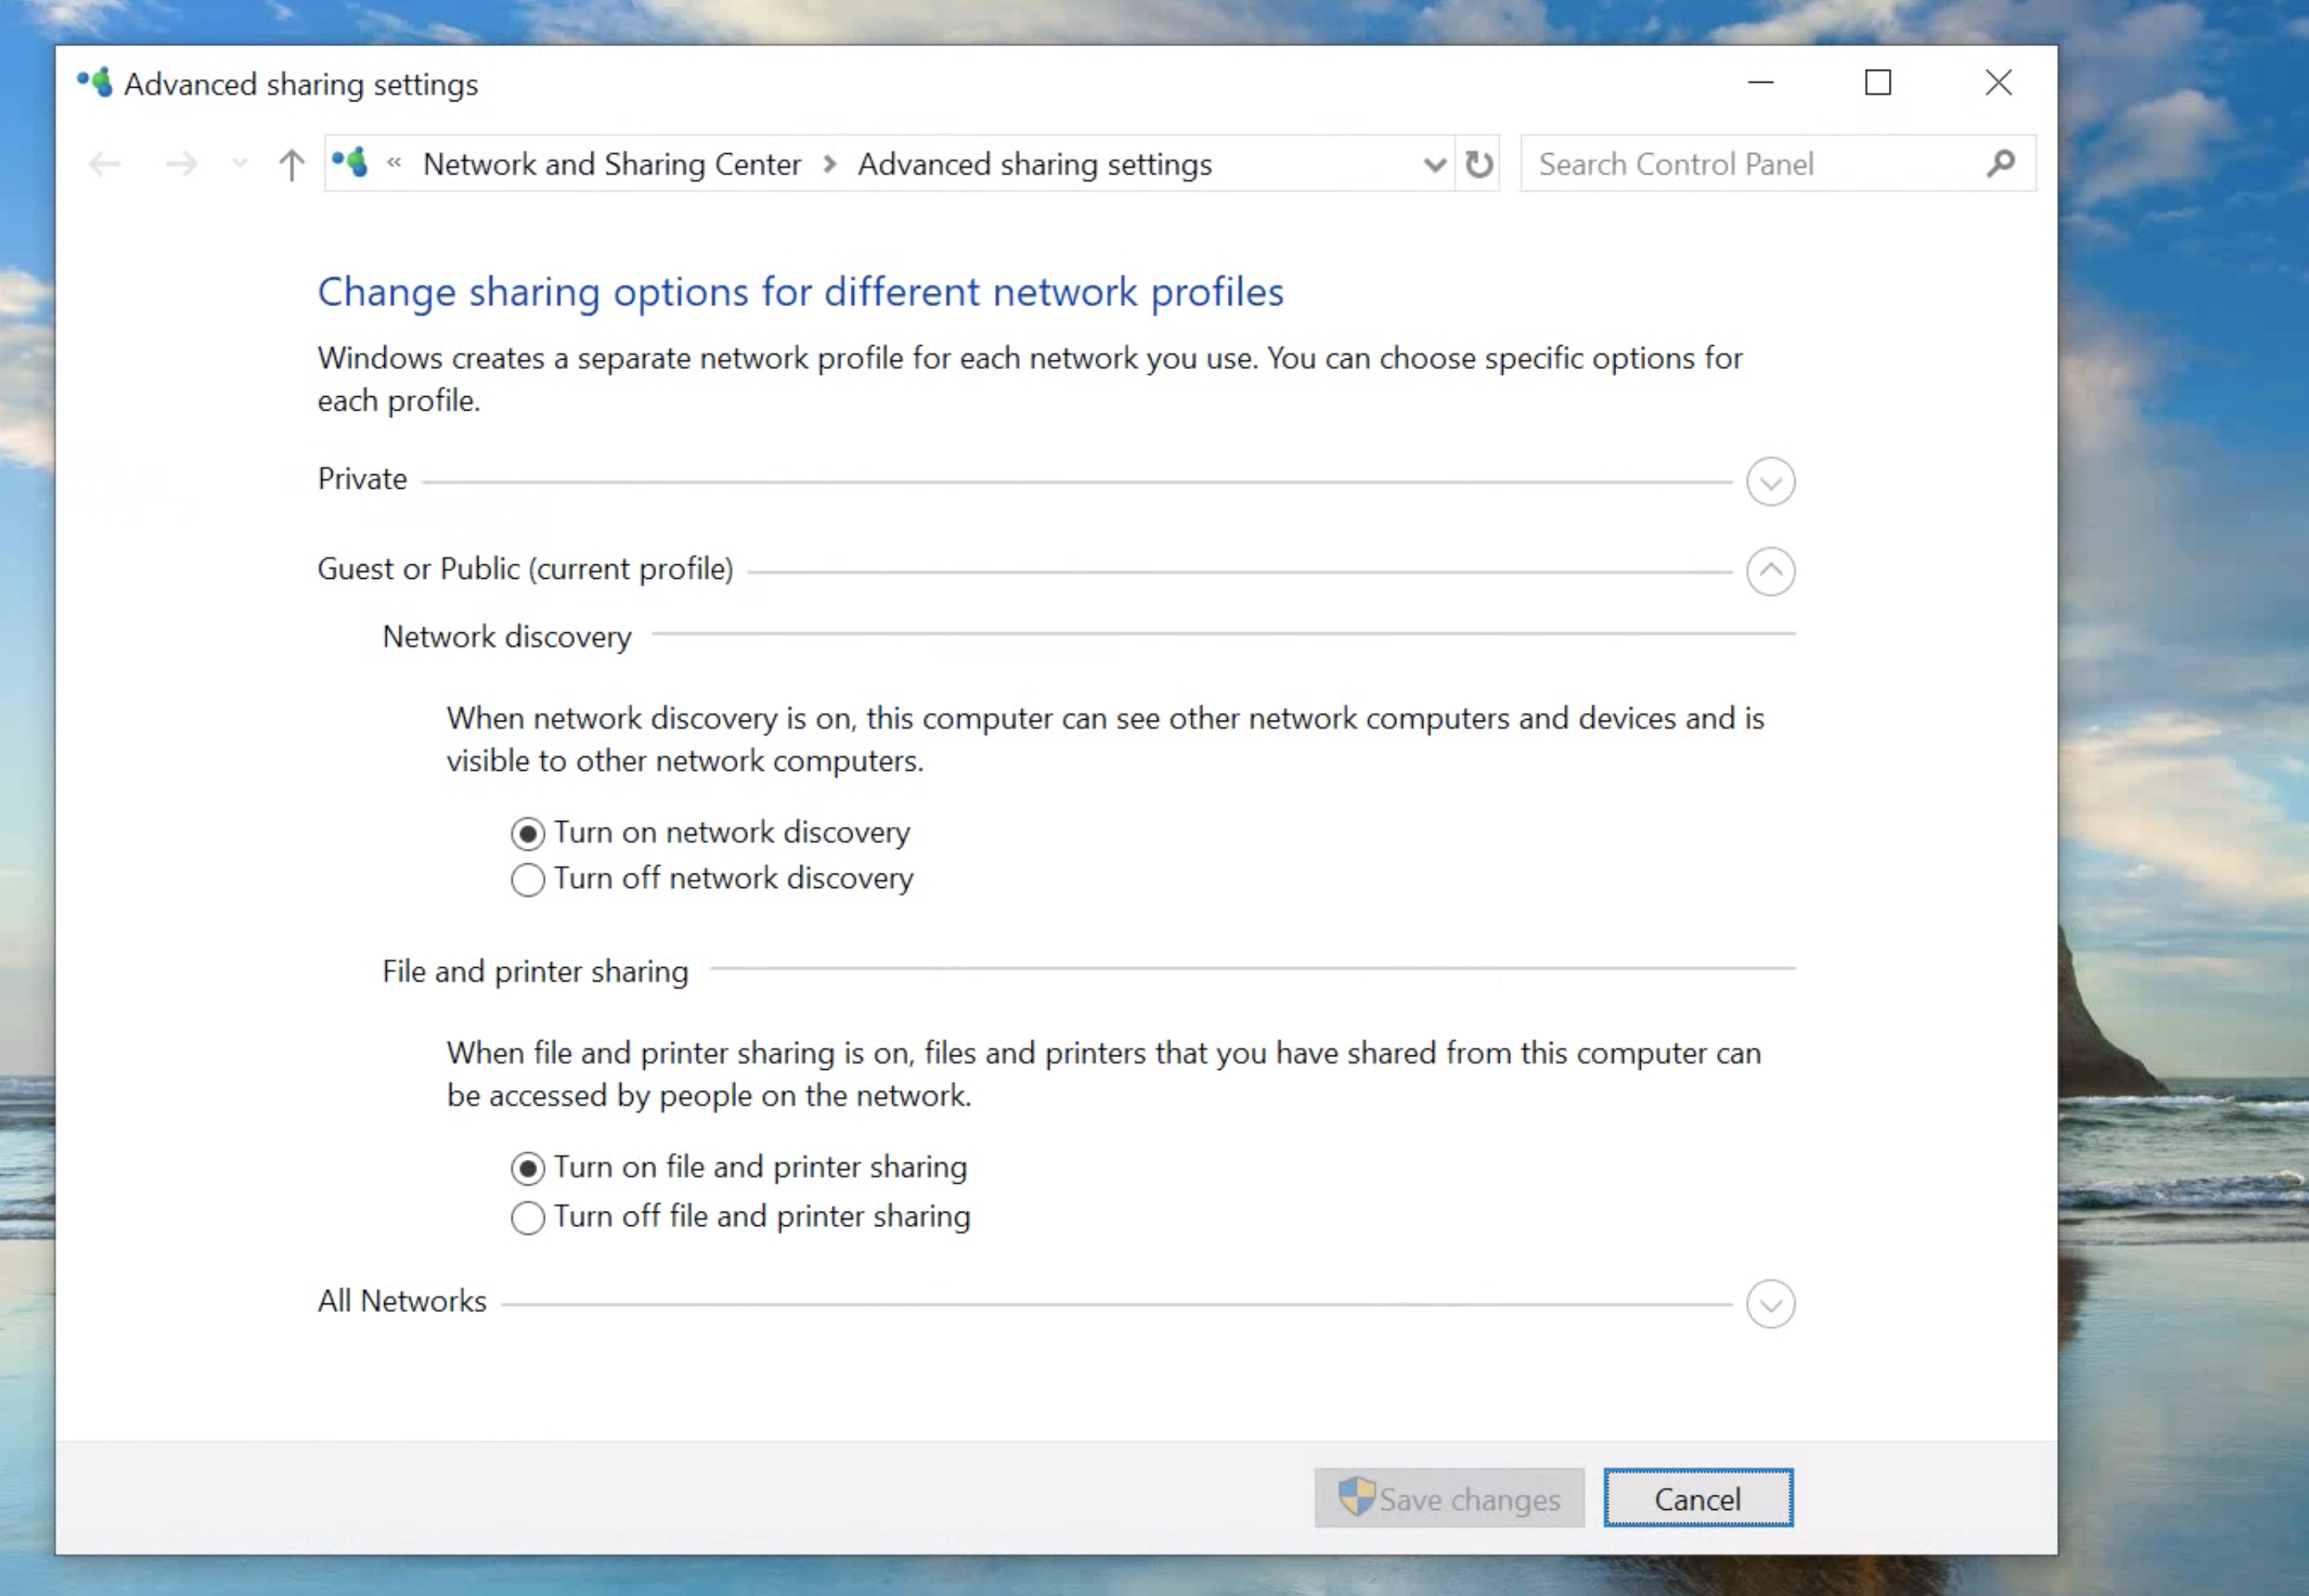
Click on the Windows logo and type in “Sharing”.
Open the Advanced Sharing settings and make sure the Network Discovery button and File and Printer Sharing button are both on.
Create the Folder you want to share
You can create this on the Mac or the PC. Remember to name it.
You’ll need to open the properties function in the folder to allow the other user to read it and make changes.
On a Mac.
Open System Preferences Again.
Open the Sharing Folder.
Click the File Sharing box.
Click the + Add button at the bottom of the list, find the folder you want to share, select it and[1] click “Add”.
On a PC.
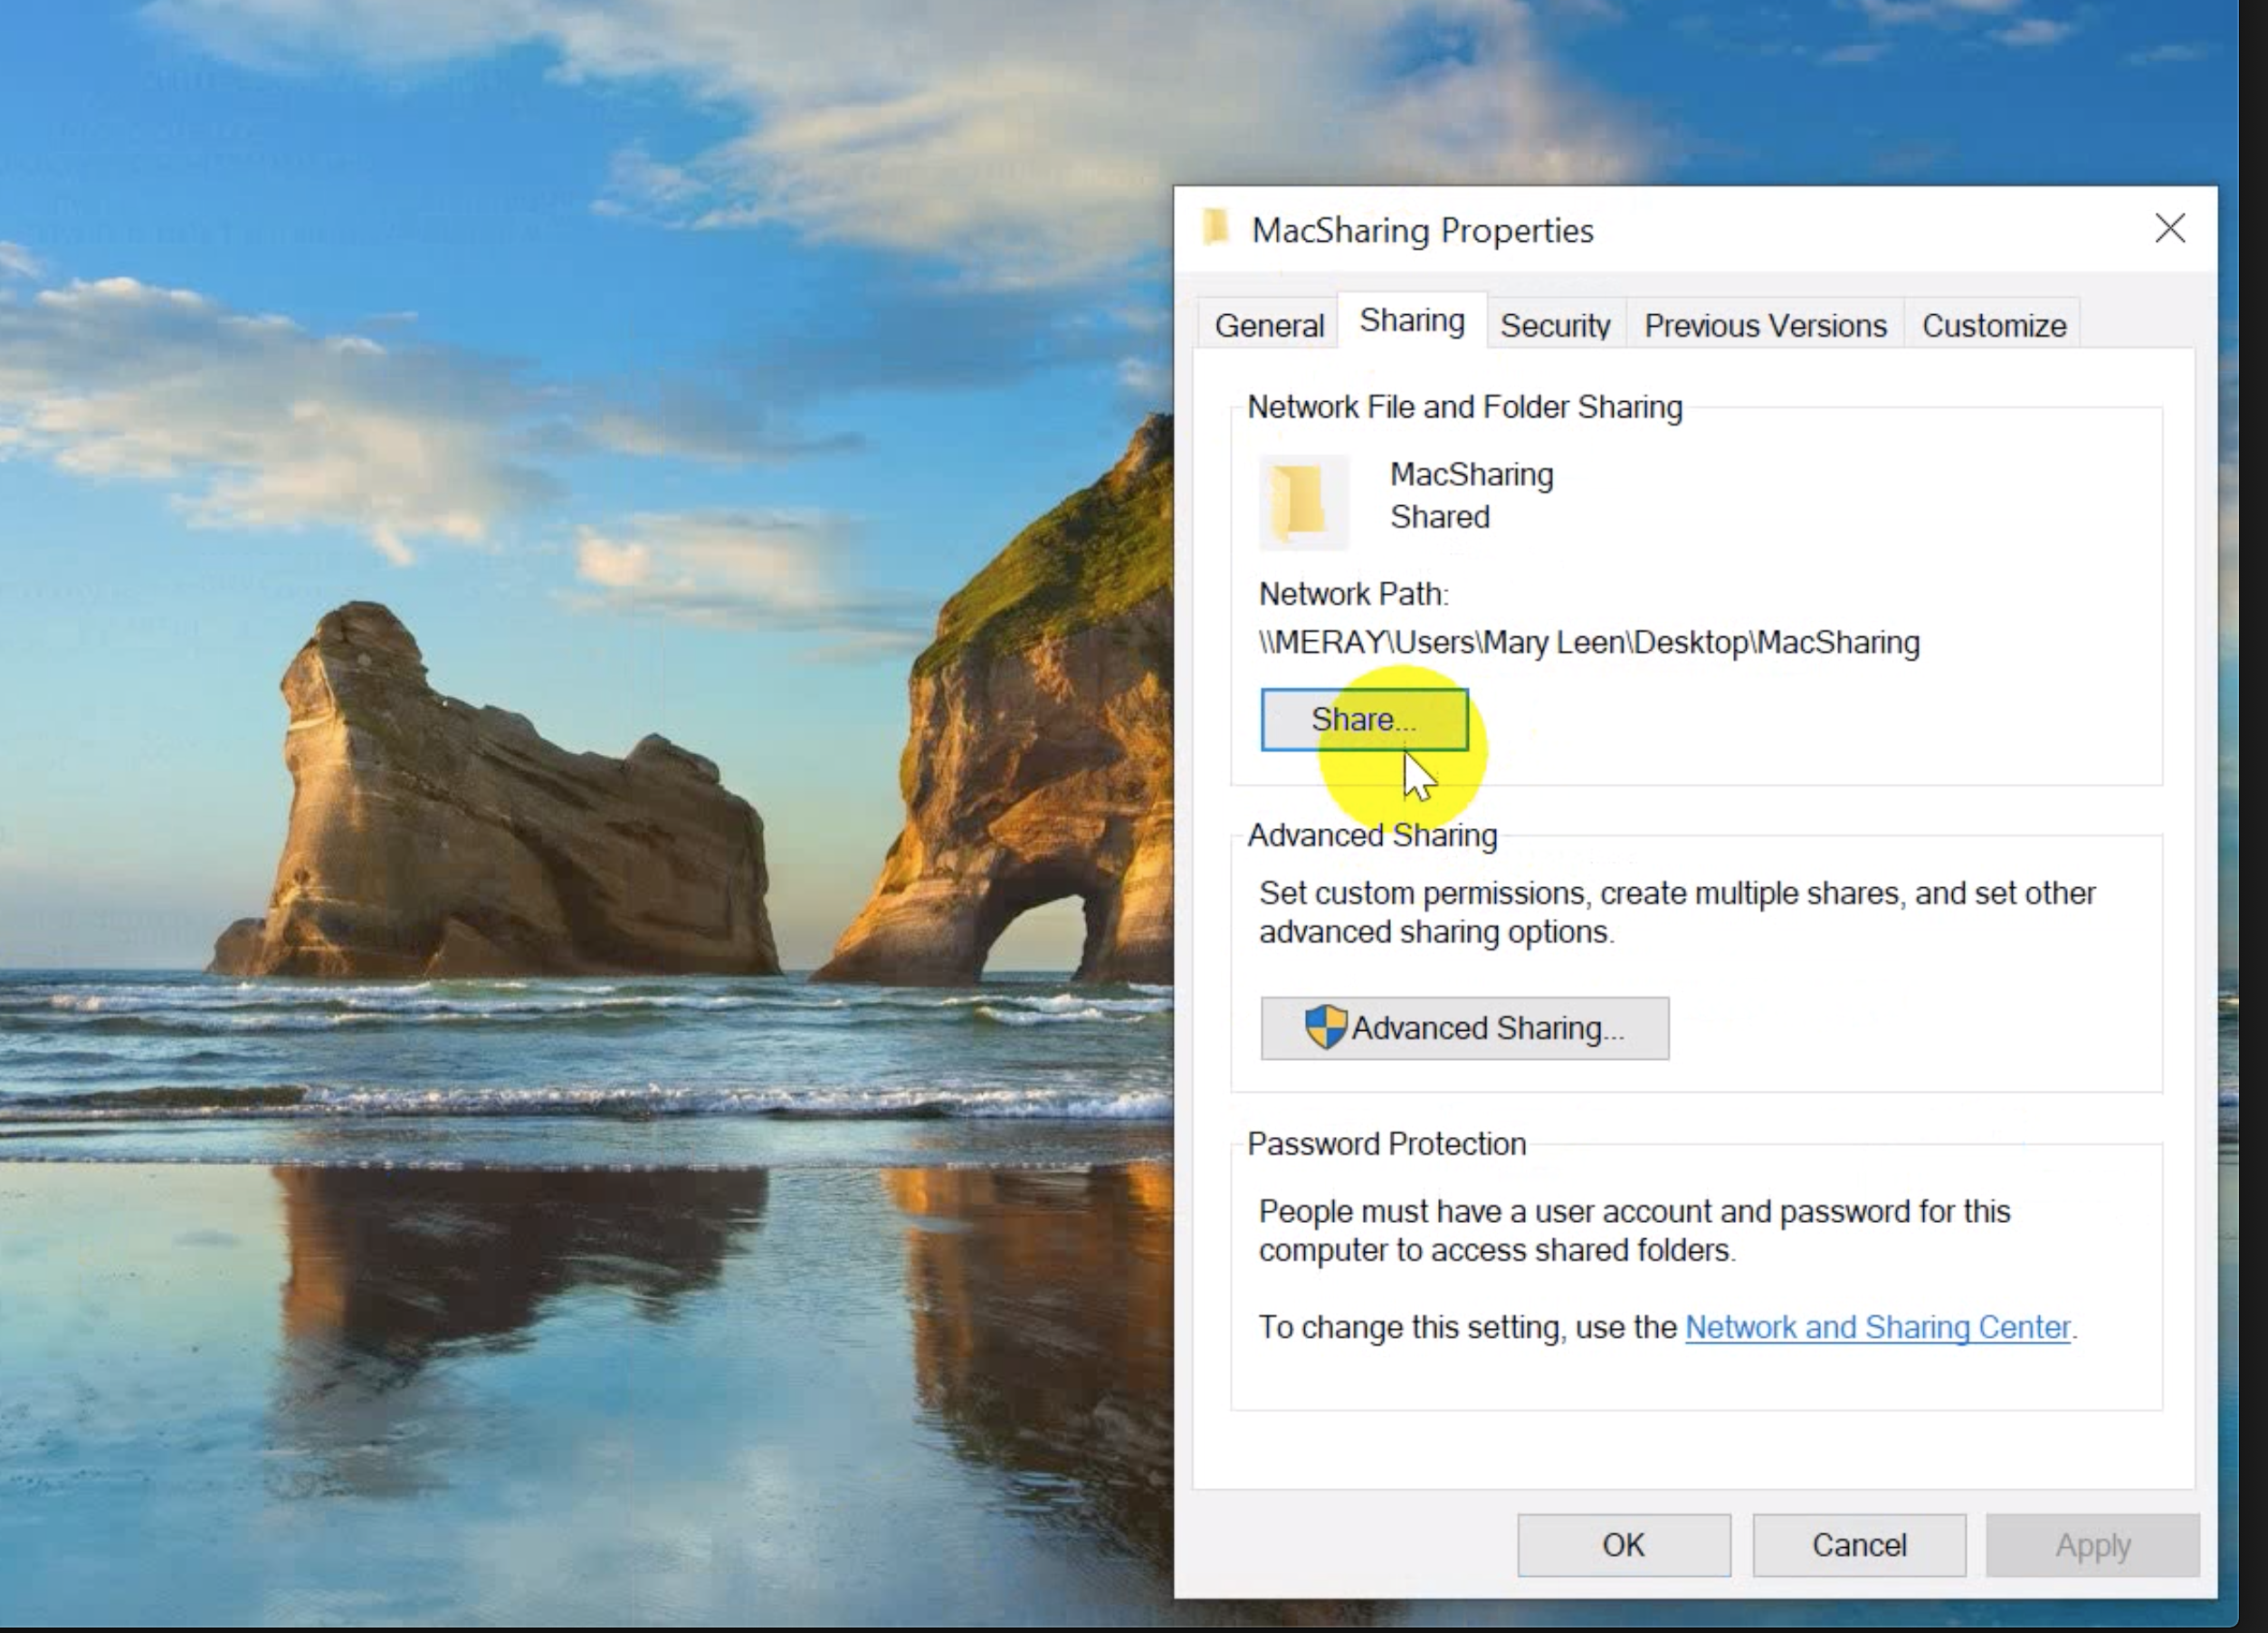
Simply go to the Sharing Tab and click on Advanced sharing.
Click “Share This Folder”. In there, you’ll see a button allowing the user to read and write in the folder.
Live by the code
We’re going to connect the two computers using the IP address. This is essentially your computer’s unique identifying code. We need it to connect the two computers.
On a Mac.
Click on the Apple logo and go to Location. You’ll see “Network Preferences” – open that.
Open the Advanced… button and then click on TCP/IP.
You’ll see your IPv4 address on top of the list.
On a PC.
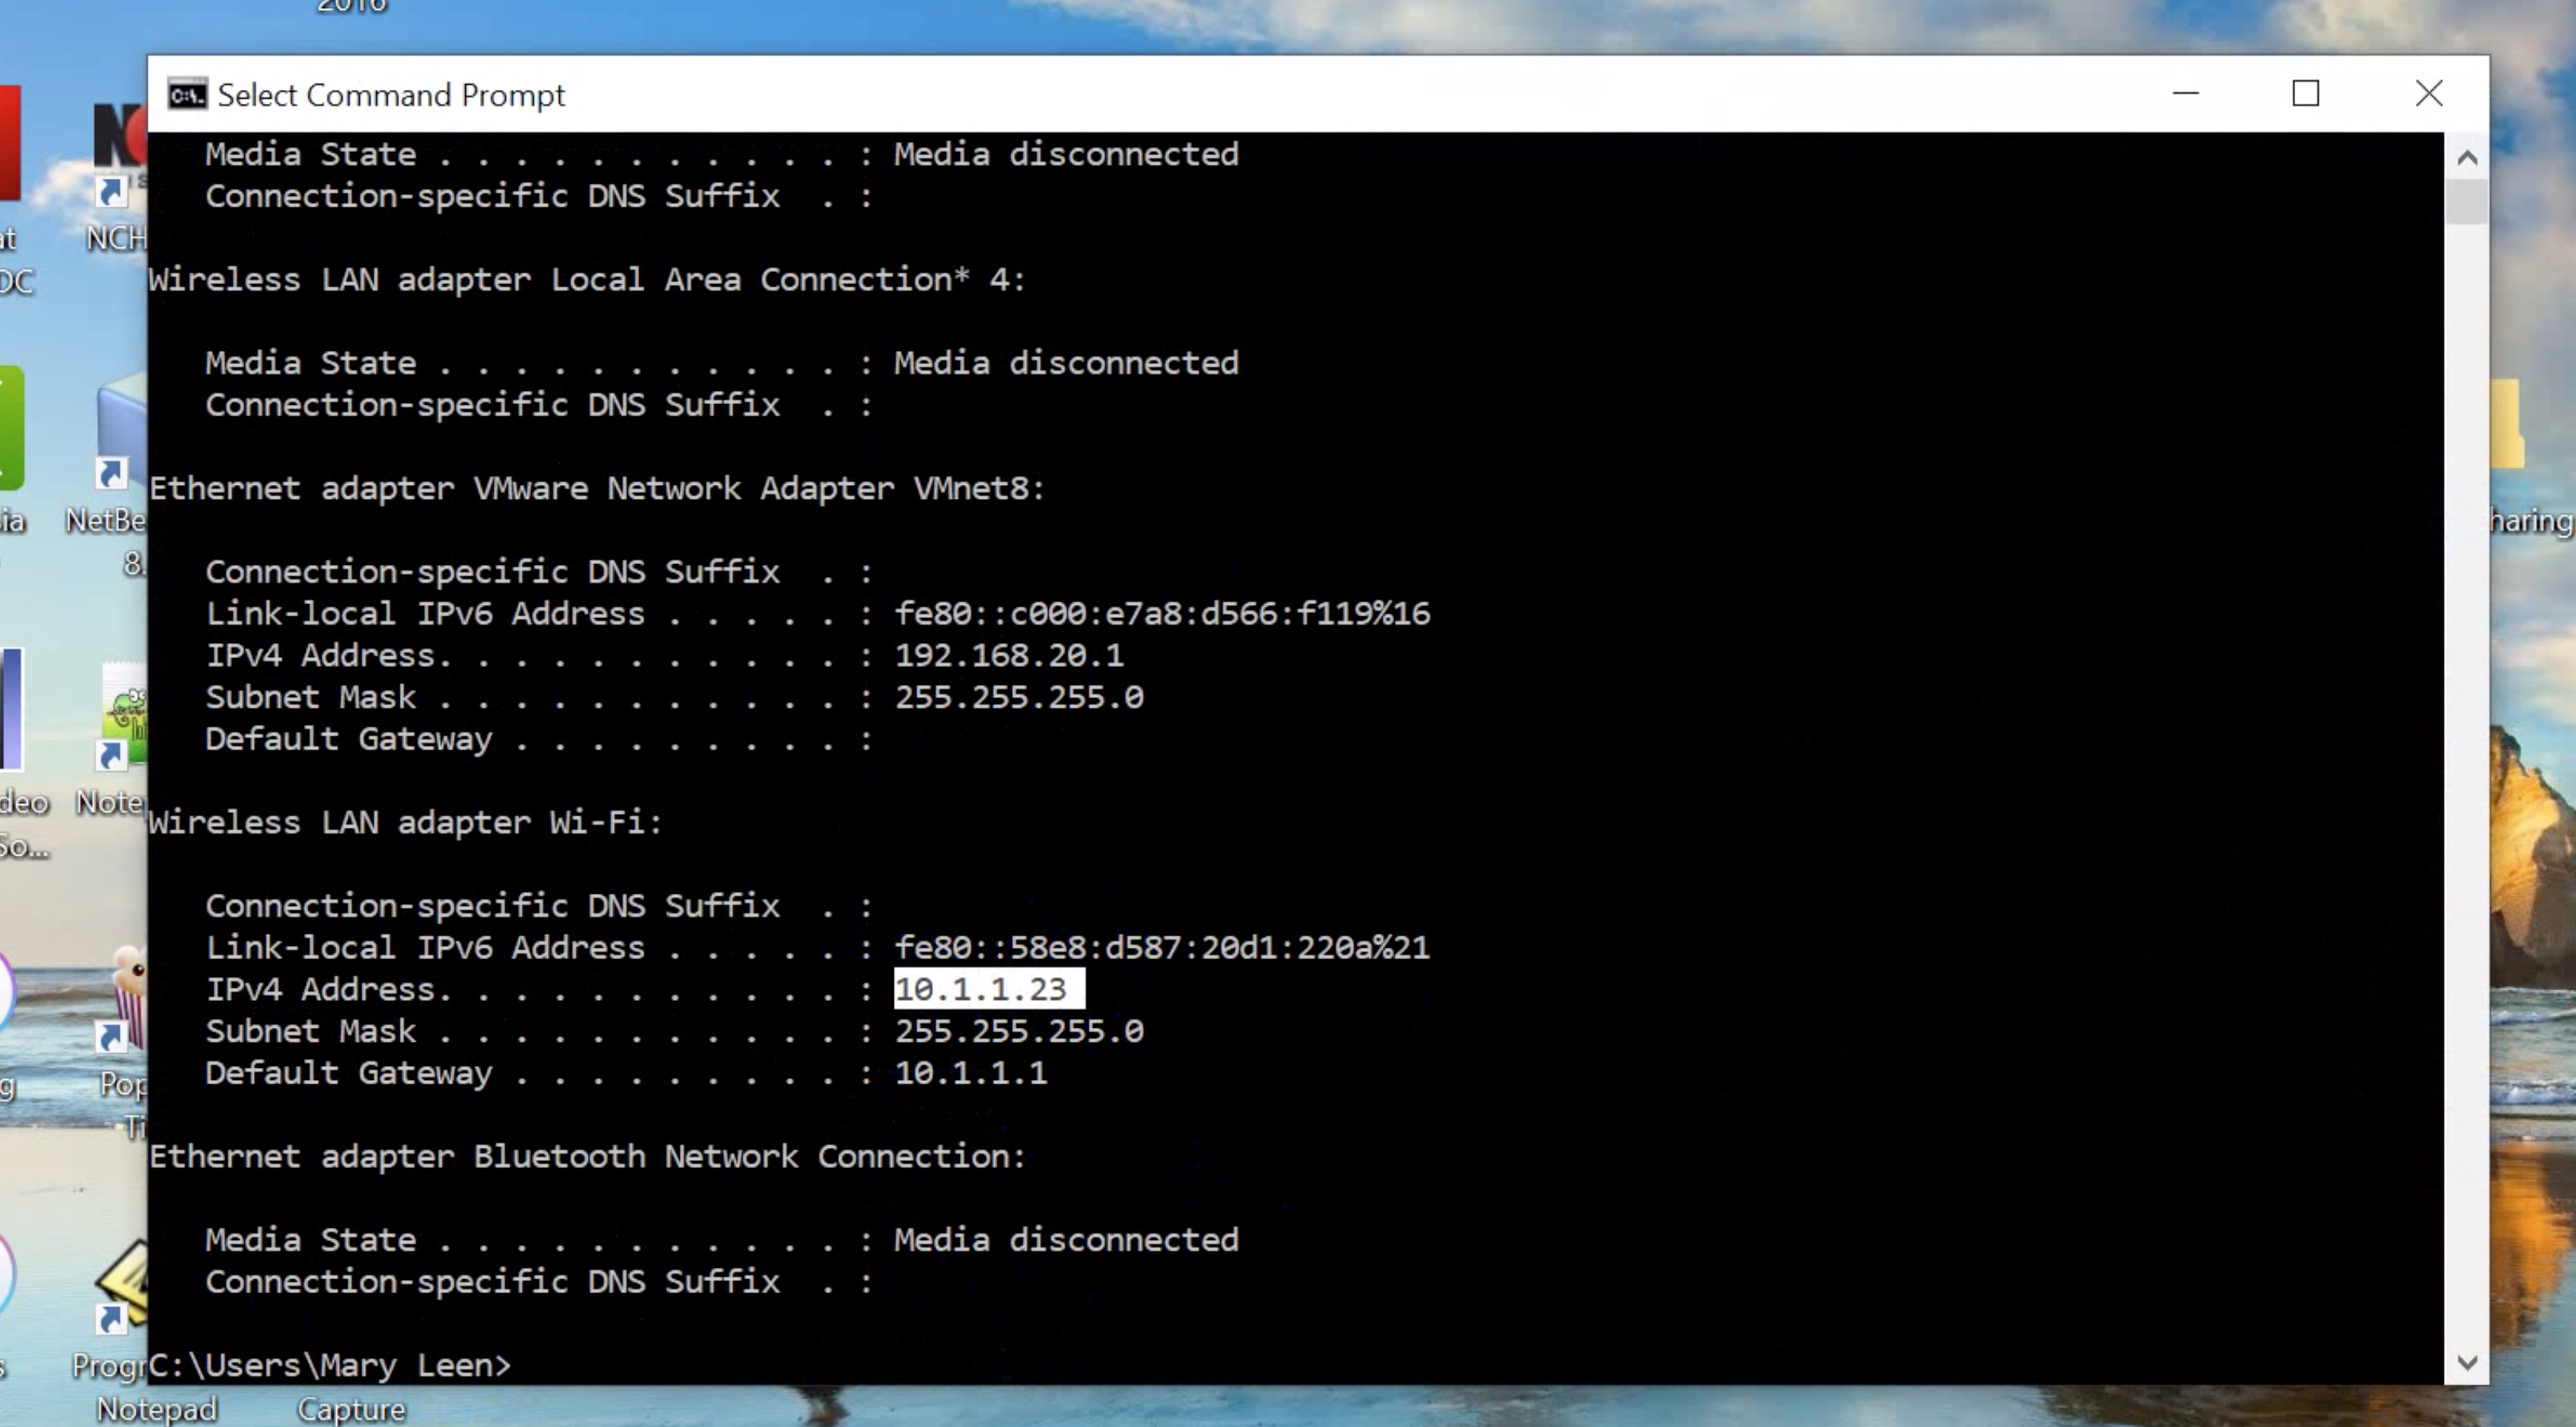
Use your Command Prompt (CMD) and type in ipconfig.
Your IPv4 will appear.
Now the fun part: Logging in to the PC from the Mac!
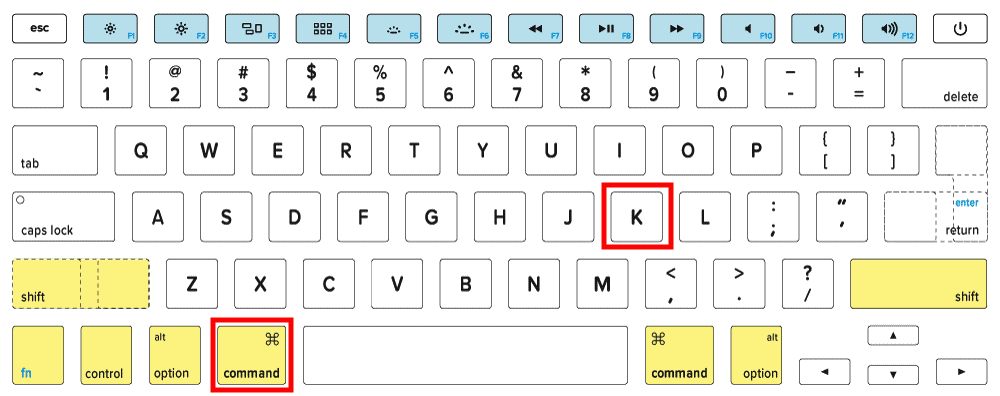
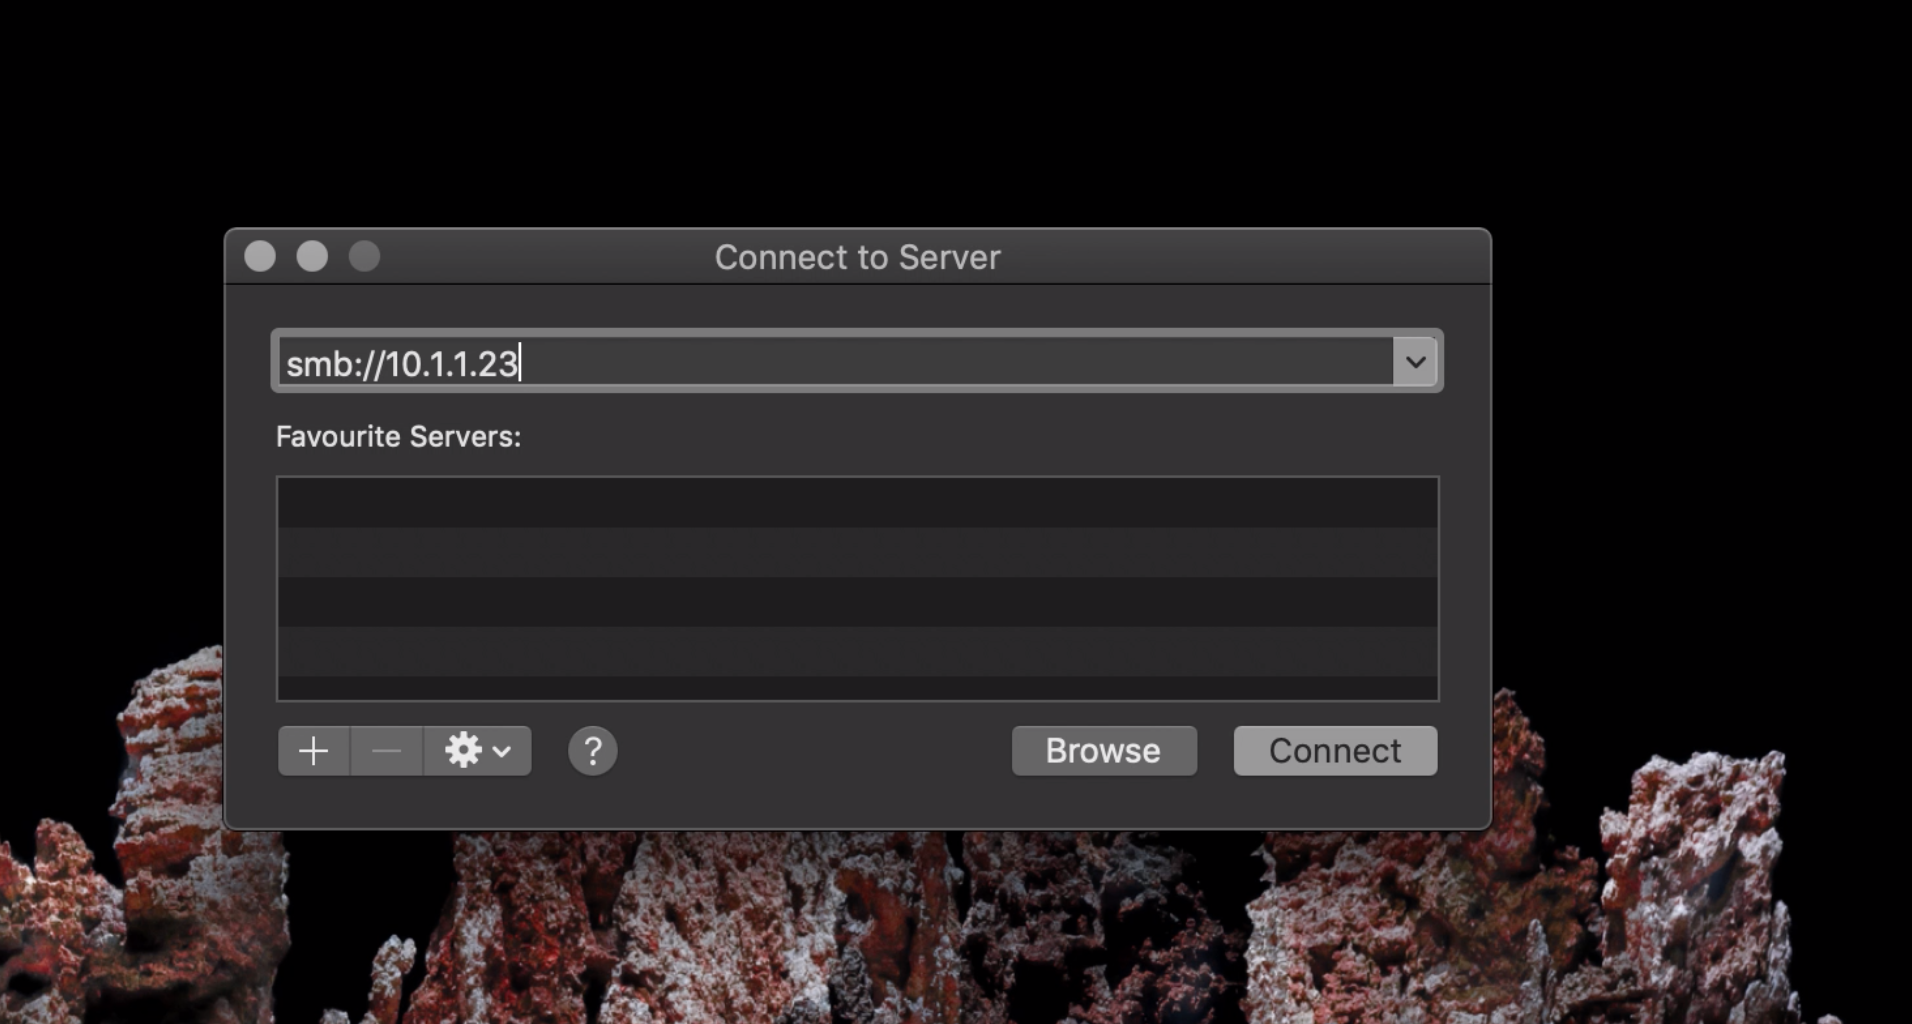
To connect to the PC from the Mac, use the keyboard shortcut ‘Command + K’. This will take you to the Insert Hyperlink page.
Type in smb://, then type in the PC’s IP Address.
Then click “Connect” and choose to connect as a guest.
You’ll need to type in the user name and password for the PC.
To connect to the Mac from the PC, follow the same prompts.
It’s yours to share
You’ll now see the folder you shared on both devices.
Open it up and you can now:
● Insert files
● Remove files.
● Change files inside the folder.
Once you’re ready to stop sharing, simply delete the folder from the computer it was created on.
It’s that easy.
Good luck and happy sharing!